Key takeaways
- Vacuum first. Use a brush attachment along seams, under cushions, and in the crevices where grit collects. Grit plus a damp cloth equals fine scratches in the topcoat.
- Spot-test your cleaner on the back or underside of a cushion. Wait ten minutes and check for color transfer on the cloth.
- Clean in sections. Apply cleaner to a microfiber cloth, never directly to the sofa. Work one cushion or panel at a time in overlapping circles, then wipe with a second, barely damp cloth.
- Let it dry fully — 20 to 30 minutes away from direct sun or vents.
- Condition last. A thin, even coat. Buff off the excess after it absorbs.
What's inside
Leather earns its keep in a living room the way a good cast-iron pan earns its place in a kitchen: it gets better with use, provided you don’t neglect it. The sofas that look extraordinary a decade in aren’t the expensive ones. They’re the ones whose owners understood that leather is a skin, that skins dry out, and that ten minutes of maintenance every season beats a reupholstery quote every time.
This guide walks through the method that actually works on finished leather furniture — the kind in roughly 95% of homes — plus how to identify what you’re working with, which products belong in your cabinet, and the handful of mistakes that quietly wreck a cushion. No miracle hacks. Just the sequence professionals use, scaled down for a Sunday afternoon.
As an Amazon Associate we earn from qualifying purchases.





First, Identify Your Leather Type
Everything downstream depends on this. Most furniture leather is finished (also called protected or pigmented) — it has a clear topcoat, resists water, and feels slightly uniform to the touch. Aniline and unfinished leathers absorb liquid instantly and darken where touched. Nubuck and suede are napped and require dry brushing, not liquid cleaner.
The test takes five seconds: put a drop of water on a hidden area. If it beads and sits, you have finished leather and can proceed with the method below. If it soaks in and leaves a dark spot, stop — you need a specialist product or a professional, because standard cleaners will blotch it permanently.
The Cleaning Sequence That Works
Order matters more than product choice. Skipping the first step is why people end up with streaks.
- Vacuum first. Use a brush attachment along seams, under cushions, and in the crevices where grit collects. Grit plus a damp cloth equals fine scratches in the topcoat.
- Spot-test your cleaner on the back or underside of a cushion. Wait ten minutes and check for color transfer on the cloth.
- Clean in sections. Apply cleaner to a microfiber cloth, never directly to the sofa. Work one cushion or panel at a time in overlapping circles, then wipe with a second, barely damp cloth.
- Let it dry fully — 20 to 30 minutes away from direct sun or vents.
- Condition last. A thin, even coat. Buff off the excess after it absorbs.
Choosing a Cleaner and Conditioner
You have two sensible routes. Combination products like the Weiman Leather Cleaner & Conditioner handle both jobs in one pass and include UV inhibitors, which matters if your sofa sits near a window — sun fade and surface cracking are the two most common ways leather ages badly. The 2-pack in the larger 22 oz size is the practical buy for a sectional.
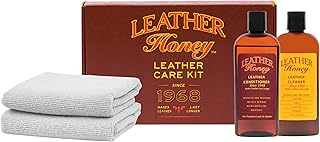
The two-step route gives you more control. Leather Honey’s Complete Leather Care Kit separates cleaning from conditioning, which lets you clean more often than you condition — the correct ratio for most households. Their standalone Leather Honey Conditioner is the one to reach for on light and white leather, where heavier oil-based products can yellow over time. For visibly tired, stiff leather that needs reviving rather than maintaining, Leather CPR Cleaner and Conditioner is formulated toward restoration, and a 4-piece cleaner and conditioner kit with applicators is a fine entry point if you’re building a kit from nothing.
Handling Spills, Stains, and Body Oils
Blot liquid spills immediately with a dry cloth — press, don’t rub. Water on finished leather is harmless if you catch it. Grease and body oil are the real adversaries, and they concentrate exactly where you’d expect: headrests and armrests. These areas need cleaning two to three times as often as the rest of the sofa. For fresh grease, cornstarch left on overnight pulls a surprising amount out before you touch it with any cleaner. Ink and dye transfer from denim or newsprint are genuinely difficult; a dedicated leather ink remover, tested first, is your only real option before calling a pro.
Building a Realistic Schedule
Wipe high-contact areas weekly with a dry microfiber cloth. Vacuum monthly. Clean and condition every three to six months — quarterly for a family sofa in daily use, twice a year for a formal room. Sofas within a few feet of a south-facing window or a radiator should be conditioned more often, since heat and UV accelerate moisture loss faster than use does.
Tips
- Keep two microfiber cloths in rotation: one for applying, one for buffing. Cross-contaminating them causes streaks.
- Less conditioner than you think. Over-application leaves a tacky film that attracts dust and transfers to clothing.
- Never use baby wipes, all-purpose spray, vinegar, or magic erasers. Alkaline and abrasive products strip the finish and the damage is not reversible.
- Position furniture at least a few feet from heat sources and use sheer window treatments on sun-exposed walls — prevention outperforms any product.
Frequently Asked Questions
Can I use soap and water on a leather sofa?
Mild soap heavily diluted can work in an emergency on finished leather, but it strips natural oils and leaves residue. Always follow with a conditioner, and switch to a dedicated leather cleaner for routine care.
How do I fix cracked leather?
Surface dryness responds well to conditioning — often dramatically, over two or three applications a week apart. Cracks that have broken through the finish into the hide need a filler-and-recolor repair, which is a professional job.
Is conditioning really necessary?
Yes. Finished leather still loses moisture through the topcoat, and dry leather cracks under normal flexing. Conditioning is the step that determines whether a sofa lasts five years or twenty.
What about faux leather?
Clean it with a damp cloth and mild soap. Skip conditioner entirely — polyurethane doesn’t absorb it, so it sits on the surface and collects dust.
Conclusion
Good leather care is unglamorous and genuinely effective: know your leather type, vacuum before you clean, work in sections, condition sparingly, and keep the sofa out of direct sun and heat. Pick one product line and stay with it, put a reminder in your calendar four times a year, and the sofa will outlast the room it’s in.