Key takeaways
- Make a cardboard template for awkward openings and test-fit it before touching the panel.
- Score the cut line lightly with a utility knife on melamine-faced pegboard to reduce chipping.
- Cut oversize by 1/16 inch, then sand to the line for a friction-perfect fit inside trim.
- Keep a spare blade on hand; hardboard resin dulls edges faster than solid wood does.
What's inside
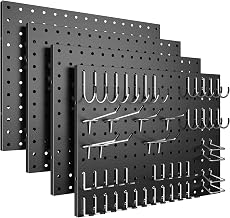
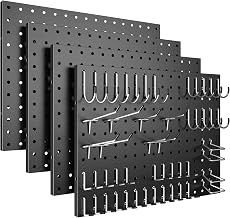
Pegboard has quietly become one of the most flexible surfaces in a well-organized home. It shows up as a full-height wall in a mudroom, a slim vertical strip beside a desk, a framed panel over a laundry counter, a cabinet-door insert holding measuring spoons. What separates a pegboard install that looks intentional from one that looks improvised is almost always the cut: whether the edges are crisp, whether the hole rows land symmetrically, and whether the panel sits flush inside its frame or trim.
The tricky part is that pegboard is not a single material. Classic tempered hardboard is dense, abrasive, and prone to fuzzy edges. MDF-core pegboard chips. Metal and polypropylene versions behave differently again. This guide walks through how to lay out a cut so the hole pattern stays balanced, which tool suits which panel and cut, how to keep the edge clean enough to leave unfinished, and how to handle the fine dust that hardboard produces. Below are the tools worth having on the bench before you start.
As an Amazon Associate we earn from qualifying purchases.


Plan the Cut Around the Hole Grid
Measure your opening first, then work backward from the holes rather than the panel edges. Standard pegboard holes sit on 1-inch centers, so a cut that lands a quarter inch from a hole leaves a fragile crescent that will blow out the first time you hang a hook there. Aim for a border of roughly half an inch to the first hole row, and if you need to lose width, split the difference between both sides so the grid reads as centered. Mark your line lightly in pencil across the face, then confirm the same measurement at both ends before you commit. On a 4×8 sheet, a sixteenth of drift across eight feet is very visible against a straight edge of trim.
Choose the Tool for the Panel and the Cut
Long straight cuts on 1/8-inch or 1/4-inch hardboard are best handled with a compact circular saw guided along a clamped straightedge. The SEESII Mini Circular Saw is well suited here: a 4-1/2 inch blade is light enough to steer accurately over a thin panel, the laser guide helps you track a pencil line, and the dust extraction port matters more than you would expect with hardboard. For notches, outlet openings, and short interior cuts, the 8-in-1 Multi Blades Hand Saw covers a lot of ground with its jab saw and fine wood blades, and its quick-change mechanism means you are not hunting for a second tool mid-project.
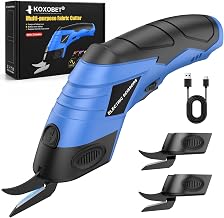
If you want a dust-free option for narrow rips and crosscuts, a shear-style 13-inch Laminate Floor Cutter handles thin hardboard and its angle-and-length stops make repeat cuts fast. Expect slightly compressed edges near holes, so keep it for cuts you will trim or frame. For plastic pegboard, felt backers, and cardboard mockups, cordless shears like the Fanttik C10 Pro BowGuide or the 2026 Upgrade Cordless Cutting Tool are genuinely useful. The Multi-Cut 401 is designed for soft materials and cardboard, so use it for templates rather than tempered hardboard, which its maker specifically excludes.
Set Up for an Edge You Do Not Have to Hide
Support the panel across its full width on rigid foam or a pair of sacrificial boards, not just at the ends. Pegboard flexes, and flex is what causes the blade to wander and the edge to splinter. Use a fine-tooth blade, 60 teeth or higher, and cut with the finished face down when using a circular saw, since the teeth exit upward and carry tear-out with them. Running a strip of blue tape along the cut line on both faces gives you a cleaner edge on painted or white melamine-coated panels. Move at a steady, unhurried pace; forcing a thin panel is what burns edges and dulls blades.
Take the Dust Seriously
Tempered hardboard produces extremely fine dust with resin binders in it. Cut outdoors or in a garage with the door open, wear a fitted N95 or better, use eye protection, and connect a vacuum to your saw if it has a port. This is one of the few places where a shear cutter earns its keep on interior projects, because it produces no airborne dust at all. Sweep with a vacuum rather than a broom, which mostly redistributes the fines.
Finish the Edge and Mount With Clearance
Knock the cut edge down with 150-grit sandpaper on a block, held flat so you keep the arris square. Raw hardboard edges soak up moisture, so seal them with primer or paint even if the face is prefinished. Pegboard also needs a gap behind it for hooks to seat, so furring strips or spacers of at least half an inch are non-negotiable. Cut those to length at the same time you cut your panel and you will only set up your saw once.
Tips
- Make a cardboard template for awkward openings and test-fit it before touching the panel.
- Score the cut line lightly with a utility knife on melamine-faced pegboard to reduce chipping.
- Cut oversize by 1/16 inch, then sand to the line for a friction-perfect fit inside trim.
- Keep a spare blade on hand; hardboard resin dulls edges faster than solid wood does.
Frequently Asked Questions
Can I cut pegboard with a jigsaw?
Yes, and it is the right call for curves and interior cutouts. Use a fine down-cut blade with the good face up, or a standard blade with the good face down, and keep the shoe pressed firmly against the panel.
Will cutting through holes weaken the panel?
Cutting between hole rows is fine. Cutting through a row leaves partial holes that chip and cannot hold hooks, so shift your line to keep at least a half-inch border.
What about metal pegboard?
Use a metal-rated blade or abrasive wheel, clamp the sheet firmly, and deburr the edge with a file afterward. A mini circular saw with a metal blade handles thin gauge panels cleanly.
Do I need to seal the cut edges?
In dry interior spaces it is optional but recommended. In garages, basements, and laundry rooms, seal them. Unsealed hardboard swells and the swelling shows at the edge.
Conclusion
A good pegboard cut is mostly planning: set your layout from the hole grid, pick a tool matched to the panel and the type of cut, support the sheet properly, and manage the dust. Do that, and the panel reads as a designed surface rather than a hardware-store leftover, which is exactly the point.