Key takeaways
- Tooth count: For moulding, more teeth mean smaller bites and cleaner exit fibres. Aim for 80 teeth minimum on a 10-inch blade and 90 to 100 on a 12-inch; 120-tooth plates exist for veneered and pre-finished stock where any chipping is fatal.
- Grind and hook angle: An ATB (alternate top bevel) grind slices fibres rather than shearing them, and a low or slightly negative hook angle keeps the blade from grabbing thin profiles on a sliding miter saw. Negative hook is the safer choice for tall crown standing against the fence.
- Plate quality and kerf: A flat, tensioned plate with laser-cut expansion slots resists wobble and heat warp, which is what causes joints to close at the top and open at the bottom. Thin-kerf plates cut faster on underpowered saws; full-kerf plates track straighter on 15-amp machines.
- Arbor and diameter fit: Check your arbor before ordering. Most consumer saws use a 5/8-inch bore, but some 12-inch industrial models and older Delta units take a 1-inch bore. Never shim a blade to fit.
- Carbide grade: Micro-grain carbide holds a keener edge longer and resharpens cleanly. If you’re cutting primed MDF, expect faster dulling from the resin binders and budget for a dedicated blade rather than sharing one with hardwood duty.
What's inside
Crown moulding is unforgiving. A baseboard joint that gaps by a millimetre reads as a shadow line from across the room, and no amount of caulk hides a chipped edge on a painted profile once the light rakes across it. The frustration most people run into isn’t their saw, it’s the blade that came bolted into it — a general-purpose 24- or 40-tooth plate designed to rip framing lumber quickly, not to leave a glass-smooth face on a piece of primed MDF or a delicate ogee in poplar. Tear-out on the top edge, fuzzy fibres on the reveal, burn marks on hardwood: all symptoms of too few teeth moving too aggressively through material that needs finesse.
This guide looks at miter saw blades specifically through the lens of trim carpentry and moulding work — high tooth counts, tight hook angles, and the geometry that produces a joint you can sand once and paint. We’ve focused on blades available in both 10-inch and 12-inch formats, covered multi-packs worth having if you’re running a mix of rough and finish cuts, and flagged the specialist plates that professional installers reach for when a room full of returns and copes has to look seamless. Below, the shortlist.
As an Amazon Associate we earn from qualifying purchases.


How to Choose a Miter Saw Blade For Moulding (2026)
- Tooth count: For moulding, more teeth mean smaller bites and cleaner exit fibres. Aim for 80 teeth minimum on a 10-inch blade and 90 to 100 on a 12-inch; 120-tooth plates exist for veneered and pre-finished stock where any chipping is fatal.
- Grind and hook angle: An ATB (alternate top bevel) grind slices fibres rather than shearing them, and a low or slightly negative hook angle keeps the blade from grabbing thin profiles on a sliding miter saw. Negative hook is the safer choice for tall crown standing against the fence.
- Plate quality and kerf: A flat, tensioned plate with laser-cut expansion slots resists wobble and heat warp, which is what causes joints to close at the top and open at the bottom. Thin-kerf plates cut faster on underpowered saws; full-kerf plates track straighter on 15-amp machines.
- Arbor and diameter fit: Check your arbor before ordering. Most consumer saws use a 5/8-inch bore, but some 12-inch industrial models and older Delta units take a 1-inch bore. Never shim a blade to fit.
- Carbide grade: Micro-grain carbide holds a keener edge longer and resharpens cleanly. If you’re cutting primed MDF, expect faster dulling from the resin binders and budget for a dedicated blade rather than sharing one with hardwood duty.
The Best Miter Saw Blade For Moulding (2026)s Reviewed
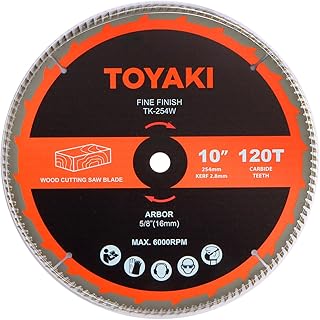
10-Inch 120-Tooth Fine-Finish Woodworking Blade
With 120 teeth on a 5/8-inch arbor, this is the highest-count 10-inch plate in the group and the one to reach for on pre-finished trim, veneered panels, and delicate picture-frame moulding. Feed it slowly and let the tooth count do the work — pushing hard will burn rather than cut.
DEWALT 12-Inch 100-Tooth Fine Finish (DWA112100)
DEWALT’s 100-tooth carbide plate is the dependable choice for 12-inch sliders, pairing a genuinely sharp factory grind with a plate that stays flat through long install days. It’s the blade we’d put on a saw that has to cut crown, casing, and the occasional hardwood stair skirt without a swap.
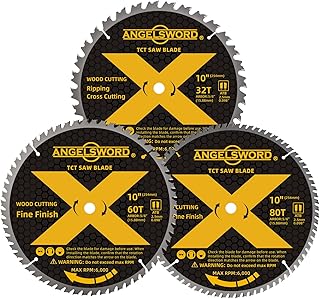
ANGELSWORD 10-Inch 3-Pack (32T / 60T / 80T)
A sensible starter set if you’re building out a workshop rather than chasing one perfect cut: the 32-tooth handles framing, the 60-tooth covers general crosscuts, and the 80-tooth is your finish blade for baseboard and casing. Excellent value, though the 80T won’t match a dedicated 120-tooth plate on melamine.
LM6300 12-Inch 100T Miter Joint Blade
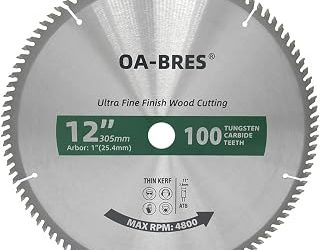
Purpose-built for miter joints with a 1-inch bore, this 100-tooth plate produces the tight, gap-free corners that define good trim work. Confirm your arbor size first — the 1-inch bore rules out most consumer saws but makes it ideal for shop and industrial machines.
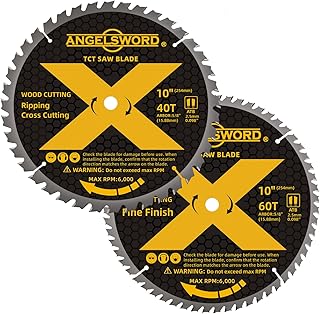
ANGELSWORD 12-Inch 2-Pack (40T / 60T)
The pragmatic two-blade solution for a 12-inch saw: 40 teeth for ripping and rough crosscuts, 60 for finish work. It’s a step below the 100-tooth options for fine moulding, but for painted trim that gets filled and sanded, the 60T does honest work at a fraction of the cost.
Frequently Asked Questions
How many teeth do I actually need for crown moulding?
Eighty teeth is the practical floor for clean results on a 10-inch saw, and 90 to 100 on a 12-inch. Higher counts help most on pre-finished and veneered profiles; on primed MDF and softwood, an 80-tooth blade with a sharp ATB grind is usually enough.
Will a high-tooth-count blade cut slower?
Yes, and that’s the point. More teeth remove less material per pass, so you feed slower and generate more heat. Ease the head down, let the blade reach full speed before contact, and pause at the bottom of the cut before lifting.
Can I use the same blade for framing and moulding?
You can, but you shouldn’t. Framing lumber contains grit, nails, and moisture that dull carbide fast, and a compromised edge shows up immediately as fuzz on trim. Keep a dedicated finish blade and label it.
Why do my miters look tight in the shop but gap on the wall?
Usually because the wall isn’t square, not because the blade failed. Check corners with a bevel gauge, split the difference, and back-cut slightly. A flat, well-tensioned plate eliminates the blade as a variable so you can trust your angle readings.
Final Thoughts
For most trim projects on a 12-inch saw, the DEWALT DWA112100 is the blade we’d buy first — consistent, sharp out of the box, and forgiving across material types. If you’re working on a 10-inch machine with pre-finished or veneered moulding, the 120-tooth fine-finish plate delivers the cleanest edges in this lineup, while the ANGELSWORD 3-pack remains the smartest pick for anyone who needs framing, general, and finish blades covered in a single purchase.