Key takeaways
- Cooking oils. Olive, vegetable, and coconut oil oxidize and go rancid, leaving a sticky, sour surface that has to be sanded off.
- Standing water and wet cloths. The main cause of black stains and raised grain, especially at a sink cutout.
- Harsh cleaners. Bleach, ammonia, and degreasers strip oil and dry the wood; a drop of dish soap is all it needs.
- Oiling only the top. A top oiled on one face absorbs moisture unevenly and can cup; oil the edges and underside periodically.
- Leaving excess oil. A greasy surface attracts dust and transfers to sleeves; buff until dry to the touch.
- Setting hot pans directly on the wood. Scorching is permanent without deep sanding; keep trivets within reach.
An oiled butcher block island is the easiest kitchen surface to keep beautiful and the easiest to ruin through neglect. Skip oiling for six months and the wood goes pale and thirsty; a spilled glass of water then soaks in, raises the grain, and leaves a gray ring. Let a wet sponge sit by the sink cutout and the end grain swells and blackens. Use the wrong product, such as vegetable oil from the pantry, and the surface turns rancid and sticky within weeks. The routine that prevents all of this takes 15 minutes a month and about $10 to $20 in oil per year for a typical 48 by 25 inch island top. Here is the full maintenance sequence, from daily wipe-down to annual refresh.
What You Need
| Item | Why | Optional? |
|---|---|---|
| Food-grade mineral oil (12 to 16 oz bottle, $8 to $12) | Penetrates and never goes rancid; the base of every butcher block regimen | No |
| Butcher block conditioner (mineral oil plus beeswax or carnauba) | Seals the surface after oiling and adds water resistance | Yes, but recommended |
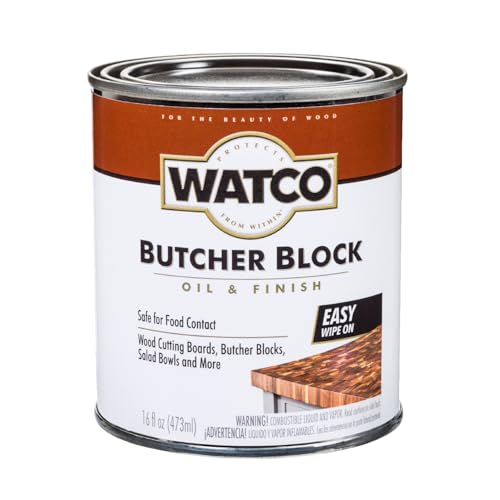
| Clear penetrating butcher block oil and finish (pint, $15 to $20) | Alternative for a harder, more water-resistant surface on islands used mostly for prep rather than cutting | Yes |
| Lint-free cotton cloths or paper towels | Applying oil and buffing off excess | No |
| Plastic scraper or bench knife | Lifts dried food without gouging | Yes |
| Coarse salt and half a lemon | Deodorizes and lightly scours stains | Yes |
| Fine sandpaper, 180 to 220 grit, and a sanding block | Smooths raised grain and removes shallow stains before re-oiling | Yes |
| Mild dish soap | Daily cleaning without stripping oil | No |
Step-by-Step
Step 1: Daily clean (2 minutes)
Scrape off food with the plastic scraper, wipe with a cloth dampened in warm water and a drop of dish soap, then wipe again with a clean damp cloth and dry immediately. Water is the enemy; never let standing liquid sit longer than a few minutes, and never leave a wet cloth or sponge on the surface.
Our top picks

As an Amazon Associate we earn from qualifying purchases at no extra cost to you.
Step 2: Deodorize and spot-treat (5 minutes, as needed)
For onion or garlic smell and light stains, sprinkle coarse salt over the area, rub with the cut face of half a lemon, wait 5 minutes, scrape and wipe clean. For a darker stain, sand the spot with 220 grit in the direction of the grain until it fades, then wipe away dust. Deep black stains around a sink usually mean water penetration and need the annual refresh below.
Step 3: Check whether the block is thirsty (1 minute)
Flick a few drops of water onto the surface. If they bead, the oil is holding. If they soak in and darken the wood within 30 seconds, it is time to oil. New blocks and blocks that have gone dry often need weekly oiling for the first month before settling into a monthly schedule.
Step 4: Apply mineral oil (10 minutes, plus 4 to 12 hours soak)
Warm the bottle in hot tap water; warm oil penetrates faster. Pour about 2 to 3 tablespoons per square foot and spread it over the top, the edges, and especially the end grain and any sink or cooktop cutout, where wood drinks fastest. Oil the underside at least twice a year to prevent cupping. Let it soak 4 hours minimum, overnight for a dry block, then wipe off the excess until the surface feels satiny, not greasy.
Step 5: Seal with conditioner (10 minutes, plus 1 hour)
Once the oil has absorbed, rub on a thin coat of wax-based conditioner with a cloth in circles, wait 20 to 60 minutes, and buff with a clean cloth. The wax fills the pores the oil left open and makes water bead noticeably longer. This is the step most people skip, and it is why their islands mark so easily.
Step 6: Annual refresh (2 hours, plus overnight)
Once a year, or when the surface feels rough or has accumulated stains, sand the whole top with 180 grit followed by 220, wiping dust between passes. Vacuum and wipe with a barely damp cloth, let it dry an hour, then oil heavily as in step 4, adding a second coat the next day, and finish with conditioner. If the island is used mostly for prep and eating rather than cutting, a clear penetrating butcher block oil and finish can replace the mineral oil at this step; it cures harder and needs reapplying only every 6 to 12 months, but it must dry 24 to 72 hours before food contact.
Mistakes to Avoid
- Cooking oils. Olive, vegetable, and coconut oil oxidize and go rancid, leaving a sticky, sour surface that has to be sanded off.
- Standing water and wet cloths. The main cause of black stains and raised grain, especially at a sink cutout.
- Harsh cleaners. Bleach, ammonia, and degreasers strip oil and dry the wood; a drop of dish soap is all it needs.
- Oiling only the top. A top oiled on one face absorbs moisture unevenly and can cup; oil the edges and underside periodically.
- Leaving excess oil. A greasy surface attracts dust and transfers to sleeves; buff until dry to the touch.
- Setting hot pans directly on the wood. Scorching is permanent without deep sanding; keep trivets within reach.
How Often
Wipe and dry daily. Oil weekly for the first month after installation or an annual sanding, then monthly; the water-bead test tells you whether to stretch to six weeks in a humid summer or tighten to three in a dry, heated winter. Condition with wax every time you oil. Sand and refresh once a year, or twice if the island is a daily cutting board. A 48 by 25 inch top uses roughly 3 to 4 ounces of mineral oil per application, so a 12 to 16 ounce bottle lasts three to four months. In 2026 mineral oil remains the standard because it is food safe, cheap, and never cures, so it can be renewed forever.
When to Call a Pro or Replace
Black staining that does not lift after sanding to 180 grit, cracks along glue lines wider than a credit card, or a top cupped more than a quarter inch are jobs for a countertop fabricator or refinisher; expect $200 to $500 to plane, re-glue, and refinish. Rot at a sink cutout, indicated by wood that dents under a fingernail, cannot be sanded out and calls for patching or replacing the top. Replacement tops run $150 to $400 for a 48 to 60 inch island in maple or rubberwood, and a 1.5 inch slab that size weighs 60 to 90 pounds. Scratches, knife marks, dryness, and light stains are never reasons to replace; they are what sanding and oil are for.
FAQ
Can I use olive oil on a butcher block island?
No. Any cooking oil eventually turns rancid and gummy. Use food-grade mineral oil, a wax-and-mineral-oil conditioner, or a clear butcher block oil formulated to cure.
How do I remove a water ring from butcher block?
Sand the ring with 220 grit along the grain until the gray fades, wipe away dust, and re-oil the area heavily, then condition. Rings that have turned black have penetrated deeper and may need 180 grit first.
Is an oil finish food safe for cutting directly on the island?
Mineral oil and wax conditioner are food safe as soon as the excess is wiped off. Curing oil finishes are food safe only after they have fully cured, usually 24 to 72 hours; check the label.
Why is my butcher block sticky after oiling?
Either too much oil was left on the surface or a cooking oil was used. Wipe with a cloth dampened in warm water and a drop of dish soap, buff dry, and if stickiness persists, sand lightly with 220 grit and re-oil with mineral oil only.