Key takeaways
- Separate tablecloth fit, confirmed shrinkage and sewing allowances. Use a sizing record and a clearly illustrative reverse-percentage calculation.
What's inside
Do not add a standard shrinkage percentage to every tablecloth order. First establish whether the quoted size describes the supplied cloth, a size after specified laundering, or unfinished fabric. Then obtain the maker’s allowance for that exact product and care process. Shrinkage allowance, table overhang and sewing allowance answer different questions.
Define the size you want to keep
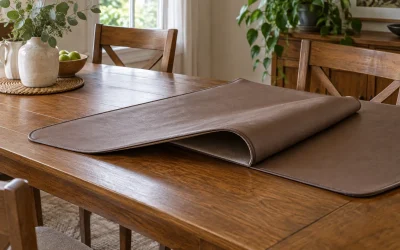
Measure the table in the configuration you will use, including any intended protector. Decide the acceptable drop at the ends and sides by trying it with the actual chairs. That gives you a target finished size in use. It does not yet tell you what size to buy or cut.
For a rectangular table, the target cloth length is table length plus twice the chosen end drop. The width uses the side drop in the same way. Keep this fit calculation on a separate line from any shrinkage calculation so that a supplier can see what you want after the recommended care process.
Write a range if a small variation is acceptable. A target of 100 inches long with an acceptable range of 99 to 101 inches is more useful than “fits eight people.” Seat counts do not define either the table dimensions or the cloth’s finished size.
Ask what the listed dimension represents
Ask whether a ready-made cloth is measured before washing, after a finishing process or after a stated wash-and-dry cycle. Request any published dimensional tolerance as well. A nominal size and a guaranteed minimum are not interchangeable.
Ferguson’s table-linen FAQ describes its table linens as pre-shrunk to minimize subsequent shrinkage. That is a product-specific statement, not a numerical allowance for every linen cloth. “Pre-shrunk” and “low shrinkage” still need clarification when a precise final dimension is essential.
For a custom cloth, tell the maker whether your supplied dimensions are desired after-care dimensions. Ask the maker to handle its own production allowance rather than adding a guessed percentage and then having the workshop add another allowance to the same number.
| Field | Record | Why it matters |
|---|---|---|
| Table setup | Shape, length, width and installed leaves | Defines the surface being covered |
| Desired finished cloth | Length, width and acceptable range | States the actual fit goal |
| Listed size basis | As supplied or after named care process | Avoids comparing unlike dimensions |
| Confirmed size change | Length and width separately, if supplied | Does not assume equal change in both directions |
| Care conditions | Applicable wash, drying and finishing instructions | Connects the allowance to its conditions |
| Custom-order instruction | Who includes manufacturing allowance? | Prevents double counting |
| Sewing plan | Hem and seam allowance, if making the cloth | Keeps cutting dimensions separate |
Worked example: an allowance is not simple addition
Suppose a hypothetical supplier confirms that a particular cloth loses five percent of its original length under the specified care process. You want a finished length of 100 inches. The corresponding starting length is 100 divided by 0.95, approximately 105.26 inches. Five percent is taken from the starting dimension, not from your desired result.
Simply adding five inches gives a starting length of 105 inches. After a five-percent reduction, that becomes 99.75 inches. The difference may be acceptable for one table and unacceptable for another; the point is to understand the calculation before making a custom order.
These figures are illustrative, not a recommendation to assume five-percent shrinkage for cotton or linen. If the supplier provides a different allowance for width, calculate width separately. If no usable figure is available, the arithmetic cannot turn uncertainty into a guaranteed fit.
Keep sewing allowances on their own line
When making a tablecloth, the cut piece must also account for hems and any seams. Those dimensions are construction choices, not shrinkage. Specify the finished hem and the fabric preparation method with the person sewing the cloth before cutting.
If an approved sample process is used to check dimensional change, label the fabric direction and record the same measurement points before and after. Follow the fabric supplier’s care instructions and let the sample reach the intended measuring condition. A casually measured damp sample and a dry finished cloth are not a controlled comparison.
A small sample can inform a sewing decision, but it does not guarantee identical behavior throughout a large finished cloth. Ask the supplier or maker how to accommodate uncertainty, especially where borders, embroidery or different materials may affect the result.
Measure consistently after normal care
For a cloth you already own, record its dimensions before the next approved laundering and again after following its complete care instructions. Lay it flat without stretching and use the same edges and units. Note whether it was pressed, because your goal is to compare the condition in which you actually use it.
Do not deliberately wash hotter or dry harder to force an oversized cloth into shape. That substitutes an uncontrolled alteration for a sizing decision. If the finished result no longer fits, discuss alteration or replacement with the maker rather than repeatedly changing the care process.
Place an order with unambiguous instructions
A useful request states the table setup, desired finished dimensions, care process and tolerance, then asks the supplier to confirm the supplied size. Save that response with the invoice. When the cloth arrives, check its label and dimensions before assuming an unexpected number is a defect or an intentional allowance.
The result should be a documented path from table size to finished cloth, with each allowance counted once. That is more reliable than buying the next size up and hoping laundering creates the intended drop.